One of my favorite tools to use for DIY house building projects is a speed square. This is a tool that will help you trace layouts onto 2×4’s, mark out sections of wood to cut on your saw, find the pitch of your roof, and much more.
However, if you’ve never used a speed square before, you may be wondering how to use it. I understand the confusion since a speed square, despite being a relatively small tool, has a lot of numbers and notches on it.
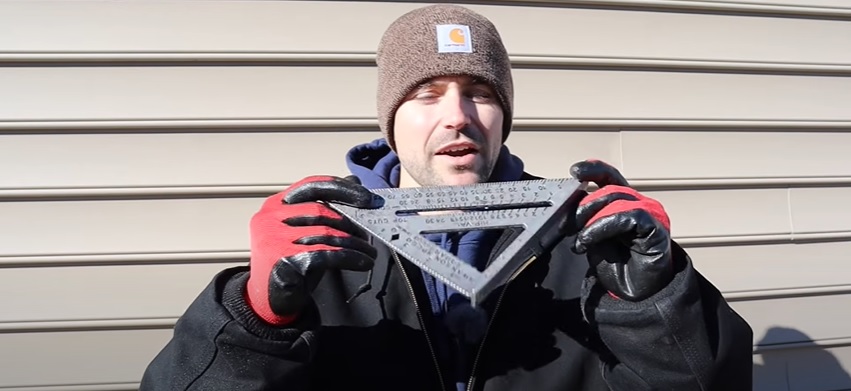
That’s why in this article, I’m going to teach you exactly how to use a speed square. My tutorial will cover everything from what all those different sets of numbers mean to 11 different ways you can put it to good use during your DIY builds.
Let’s get to it!
DISCLAIMER – This article does contain affiliate links. I earn a small commission that helps support this website at no extra cost to you, if one of the links is used to make a purchase.
Table of Contents
ToggleWhich Speed Square To Use
Before I explain how to use a speed square, I’ll tell you which one I like to use. It’s the classic 7” version put out by Swanson (you can find it in the Excellent Laborer Amazon store). Swanson was actually the brains behind the speed square back in 1925, and in my opinion, they put out the perfect design. And if it’s not broken after nearly a hundred years, why fix it?
Step By Step Guide To Using A Speed Square
Now I’ll explain 11 different uses for a speed square.
1. Right Angles
One of the most basic functions of a speed square is to make simple right angles.

To use your speed square for this purpose, lay the edge of it along the top of the material you want to cut. Then trace a line along the side of the square with a pencil (in the image above and the ones below, I use a Sharpie for emphasis only) to get a perfect 90-degree angle.
2. Scribe Notches
The Swanson speed square comes with notches along the inside. These notches are set apart at increments of ¼” . You can use these notches to scribe straight lines in a horizontal direction in the material you want to cut. That way, you have a mark to guide you when you feed the material through a saw blade.
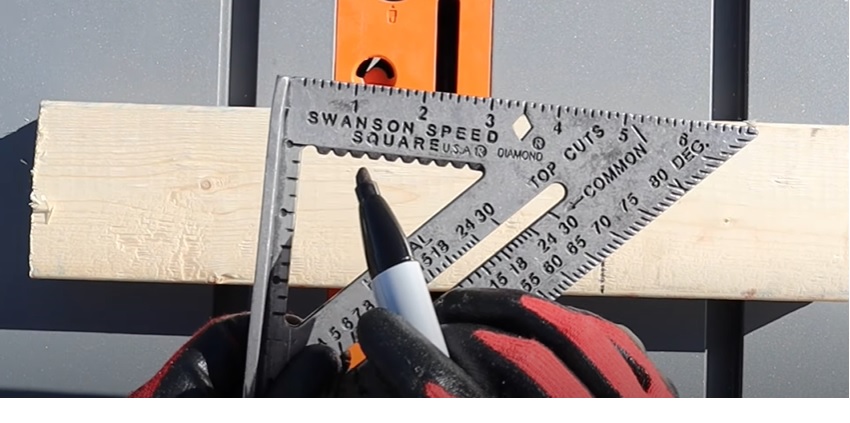

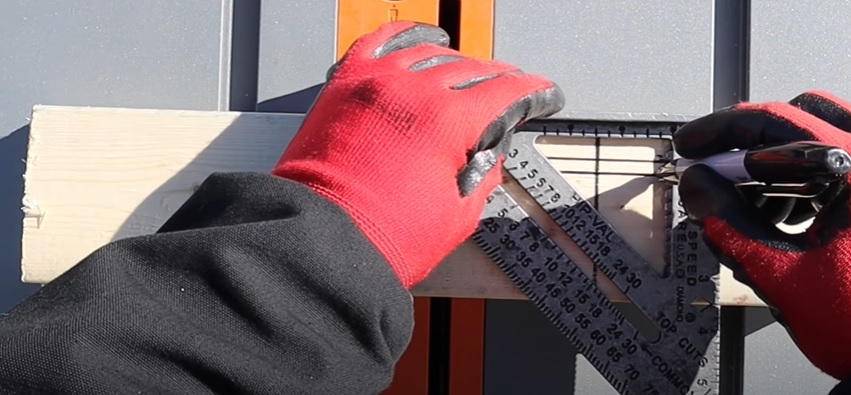
To do that, lay your speed square edge alongside the top edge of the material you want to mark, just like you did to line it up for tracing a right angle. Then, place your pencil in the notch for the ¼” increment you want and move the speed square from side to side to guide the pencil mark. This will help you mark out a straight horizontal line.
3. Layout Markings
At a right angle to the notches on the speed square is a small ruler that goes up to 3” in length. You can use this ruler to make accurate layout markings on a 2×4, as for a wall frame.
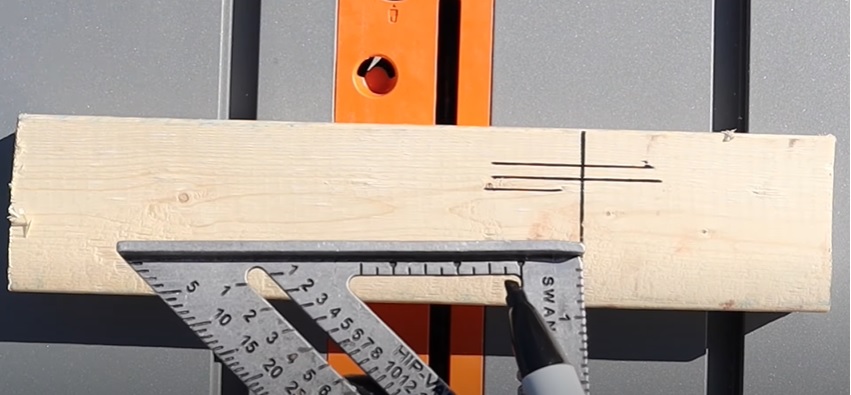
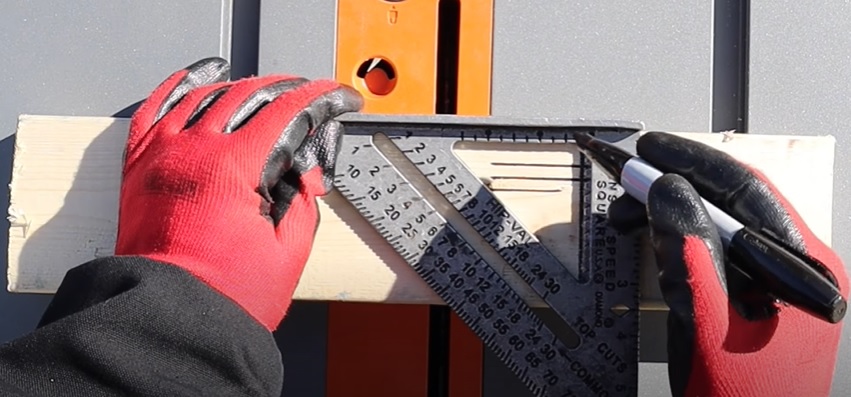
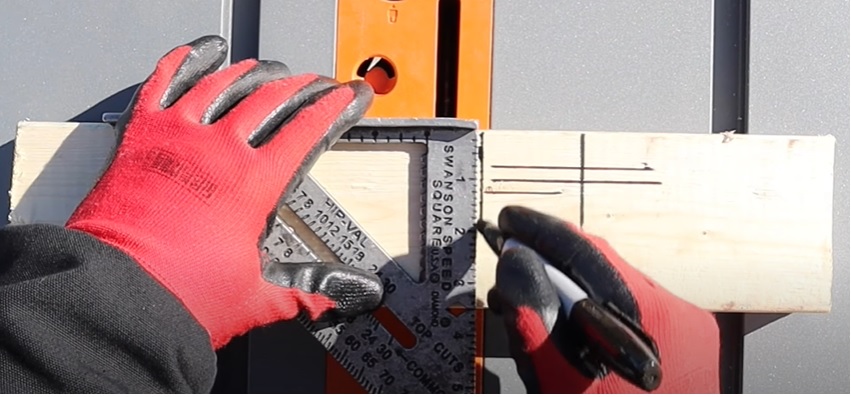
4. 2×4 Wall Layout
The 7” speed square can stretch across two 2×4’s at a time. Using the small 3” ruler on the speed square, you can mark your wall layout for studs, jacks, and more.
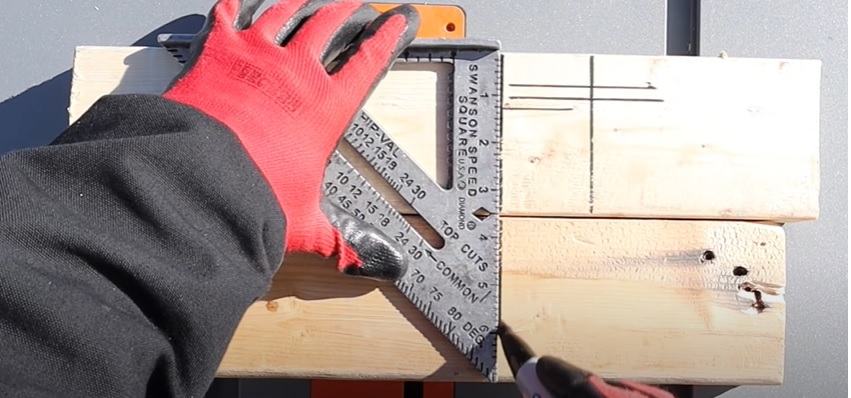
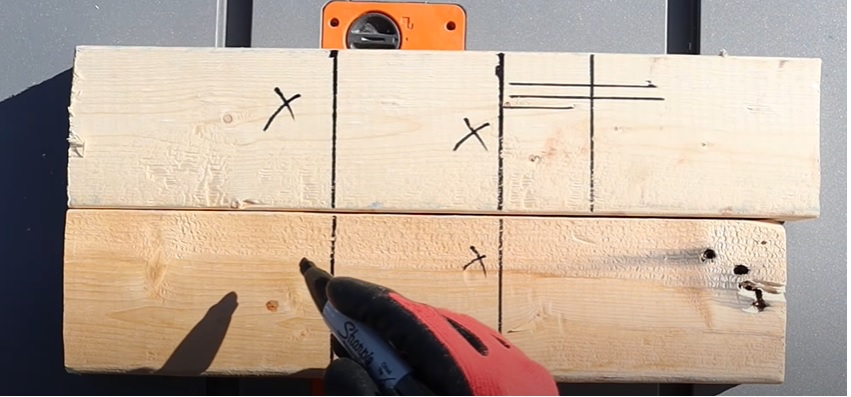
5. Common Rafter Plumb Lines
The next element I want to point out on the speed square is the common numbers. This is the next most used part of the speed square after the applications we’ve covered so far. They’re used to make plumb cuts for rafters – an important function that needs to be as precise as possible.

To do that, line the pivot point of your speed square up with the top of the wood that you want to cut into a rafter. Now, let’s say the pitch of your roof is 7/12. Find the common number 7 on your speed square, line it up with the top edge of the rafter, and then trace a line along the opposite edge of the speed square across the wood.
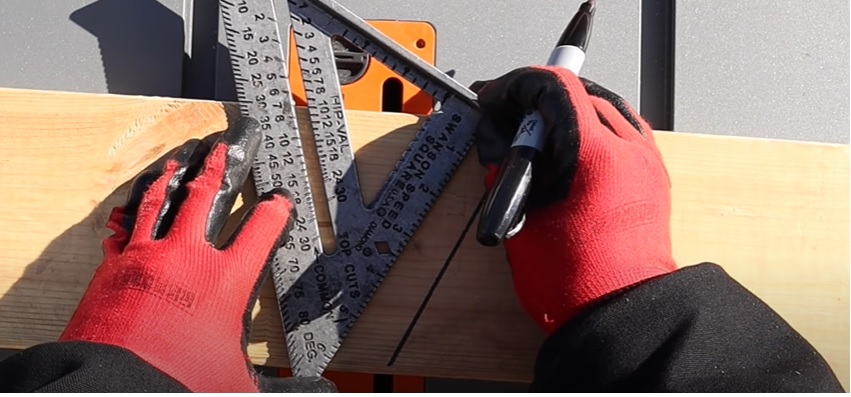
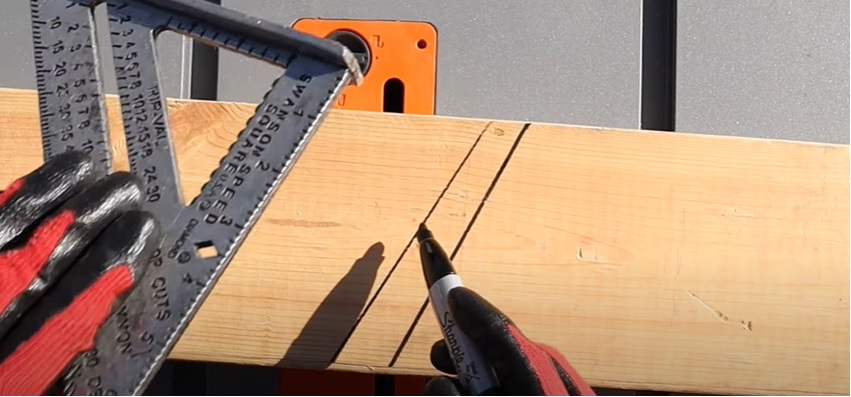
Now you have a mark for the cut you need to make to allow the rafter to butt up flush against the girder.
6. Make A Birdsmouth
A speed square makes measuring and cutting out a birdsmouth simple and easy. For those of you who don’t know, a birdsmouth is a term used in construction for the cut-out joint that connects the top plate of a wall to a rafter.
To mark out a birdsmouth, first use your speed square to scribe a line for the pitch at the end of your rafter, just like you did in the previous section.
Next, find the vertical lines that I show on my square in the image below.
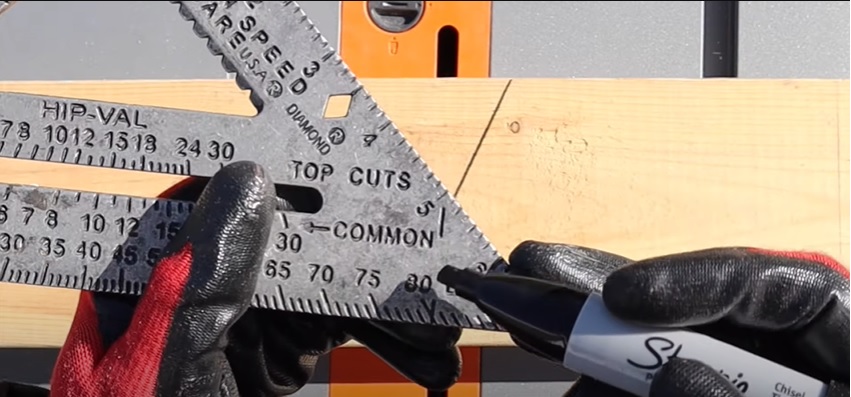
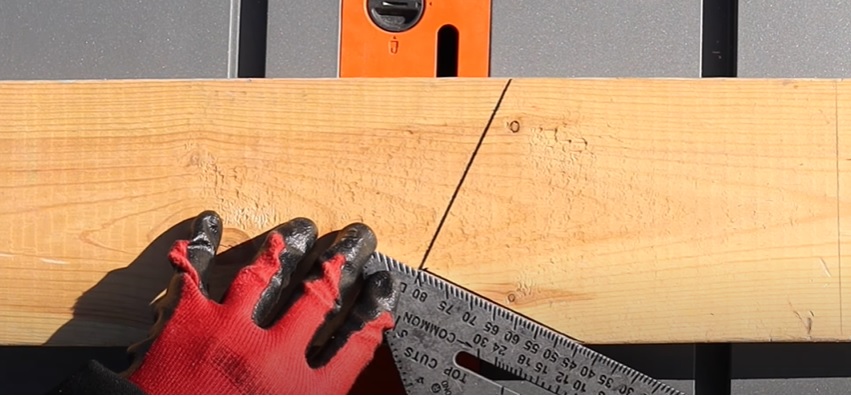
Finally, line up the lines on the speed square with the pencil mark you made for rafter pitch. Move the speed square down as far as you need it to go, and then trace a line on the side. This mark is called the seat cut, while the opposite mark is called the heel cut. They let you know where to cut the birdsmouth.

7. The Diamond
The diamond is a diamond-shaped notch in your speed square. You can use it to mark out your birdsmouth cut on a rafter instead of the previous method.

For this method of marking a birdsmouth, mark out the pitch angle on your rafter. Then flip your speed square over, line up the pivot point with the edge of the piece of wood on the bottom, and then move the speed square to the side until the diamond cut out sits over the pitch line you scribed earlier. Then, trace your pencil along the side of the speed square to mark out the seat cut.
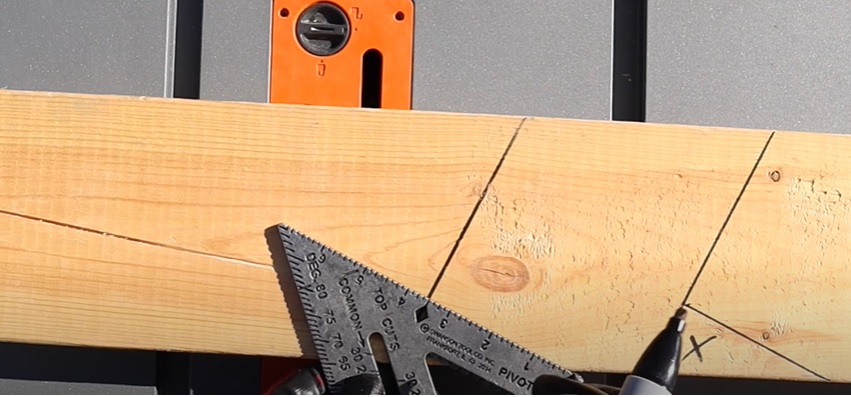
As you can see below, both methods of marking a birdsmouth produce similar results.
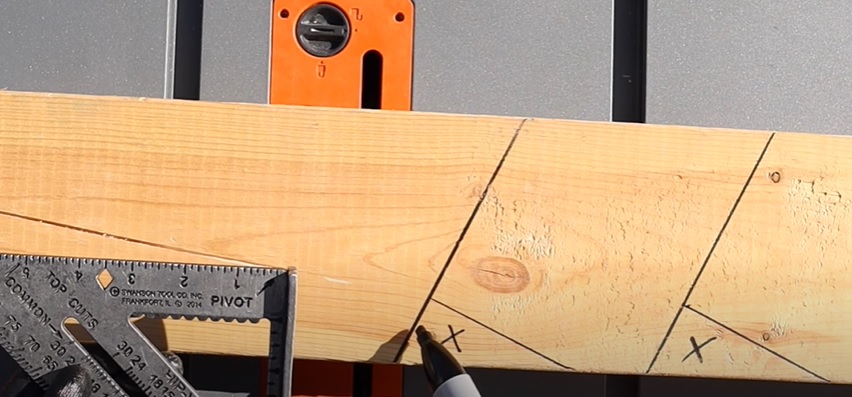
8. Hip-Valley “Hip-Val” Rafter Plumb Lines
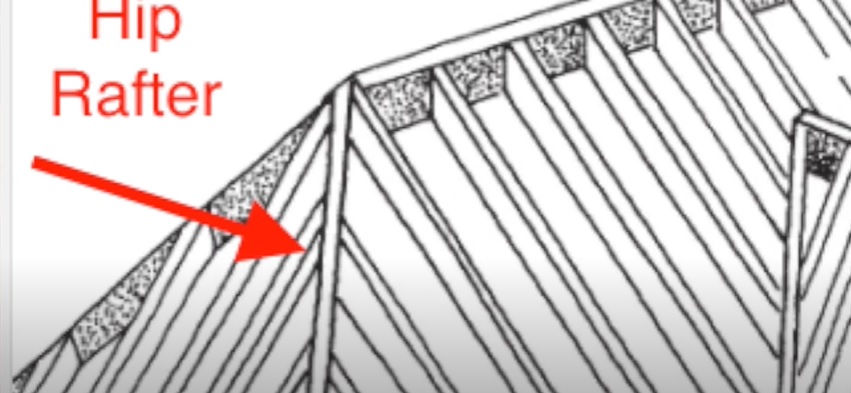
Sitting above the common number line is the hip-valley number line (labeled on the speed square as “Hip-Val”). Refer to these numbers when you need to mark out a cut for a rafter on a hip-valley roof. If you don’t know what that looks like, see the image below.

9. Protractor
A speed square can also function as a protractor, as it has degree markings on one of its outside edges.

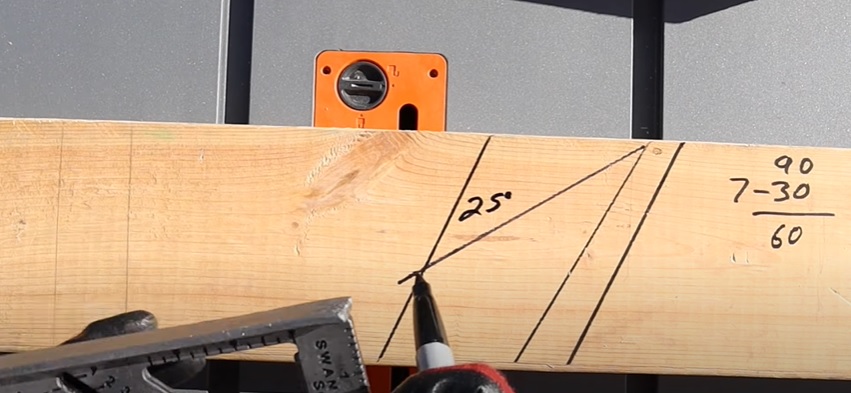
If you need a cut that lays at a specific angle, just line up the speed square on the edge of the material, pivot it until the degree you want to mark lines up with the material’s edge, and then trace the line against the side of your speed square with your pencil.
10. Square Walls
You can use a speed square to make sure your wall is square. All you have to do is put the speed square in the corner of the wall and ensure its sides lay flush against the top and side of the wall.
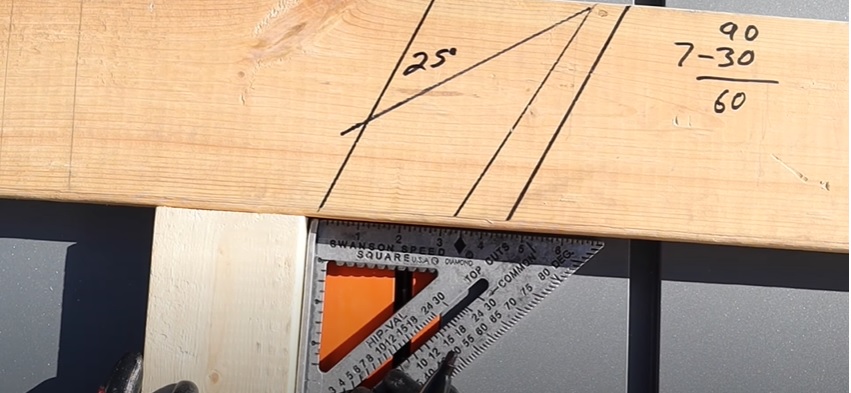
11. Find Roof Pitch
This last application of a speed square is especially useful if you’re working on a house remodel. With a little clever finagling, the speed square can tell you the pitch of an existing roof.
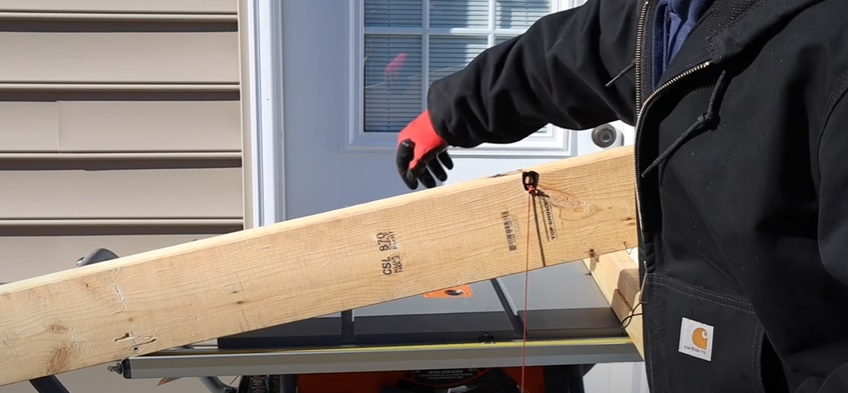
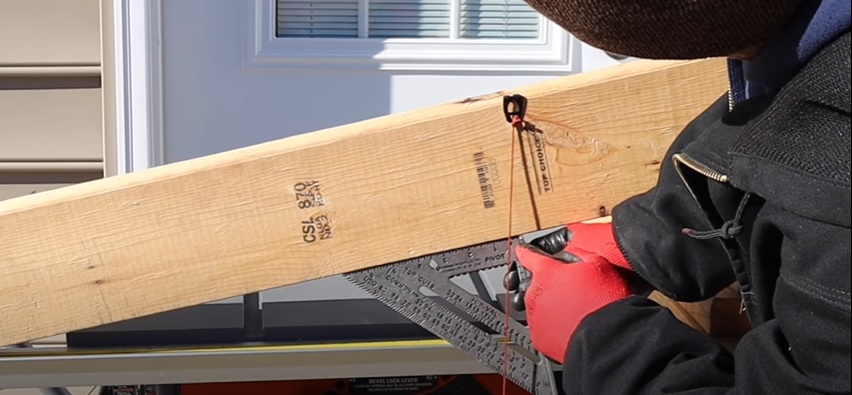
To try this, first hook a weighted string onto the top of the rafter of your roof and let it dangle. Then line the ruler side of your speed square up against the underside of the rafter and move it up until the pivot point is in line with the string. Then look to see which common number the string intersects with. That will tell you the pitch of the roof.
I’m sure you understand now why I love speed squares. You can use it for so many things! It truly is an excellent laborer’s dream tool.
For more excellent tutorials, check out the Excellent Laborer YouTube channel!
