Installing an exterior door by yourself is so easy, you can do it in as few as 10 minutes! If you like the idea of setting all your exterior doors up PROPERLY, as well as quickly as possible, then this tutorial is for you!
Before I dig into the tools and supplies you’re going to need, here’s something important to keep in mind:
ALWAYS CHECK YOUR LOCAL BUILDING CODES before you begin a DIY home build! (Gotcha! I know I say that in every article, but trust me, you’ll thank yourself for doing it.)
Tools and Supplies Needed To Install an Interior Door in 10 Minutes
DISCLAIMER – This article does contain affiliate links. I earn a small commission that helps support this website at no extra cost to you, if one of the links is used to make a purchase.
These are the tools and supplies you’ll need to start your speedy exterior door installation and make it go as smoothly as possible. (For an even better experience, try the trusted brands I use on my projects, all of which are listed in the Excellent Laborer Amazon store.)
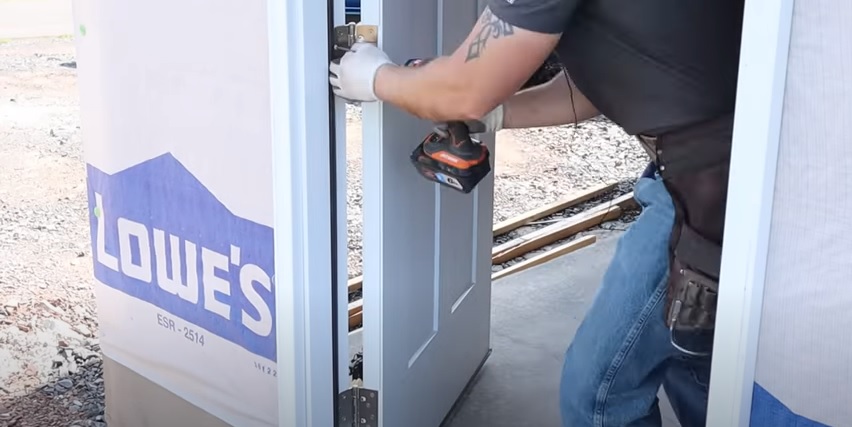
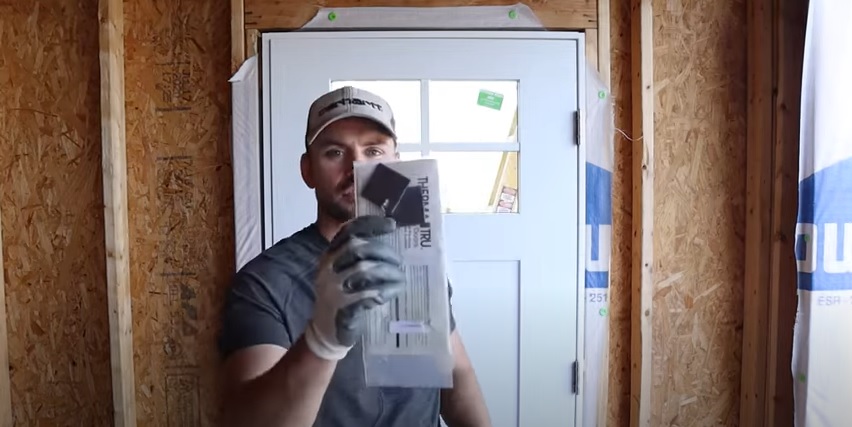
- Fiberglass Therma-Tru Door w/ PVC Jamb (this is the model I used during my live demonstration of this tutorial. If you’re interested in it, I bought it at Lowe’s Home Improvement.)
- Level
- Drill
- #2 bit on an impact driver (alternatively, you can use it on a drill)
- Finish nailer
- Liquid Nails
- Shims
- Hammer
- Galvanized finish nails
- Tape measure
- Flashing tape
- Tyvek tape
Step-by-Step Guide To Installing an Exterior Door in 10 Minutes
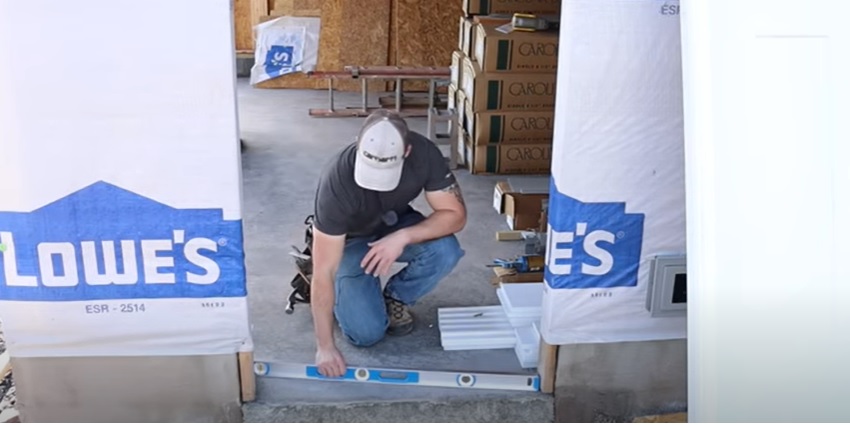
Step 1: Check your subfloor and either side of your rough opening with your level to ensure they’re level. If one of them is not, you’ll need to address that before you move on.
Step 2: Use your tape measure to check the width and height of your rough opening and ensure that the door you purchased will fit.
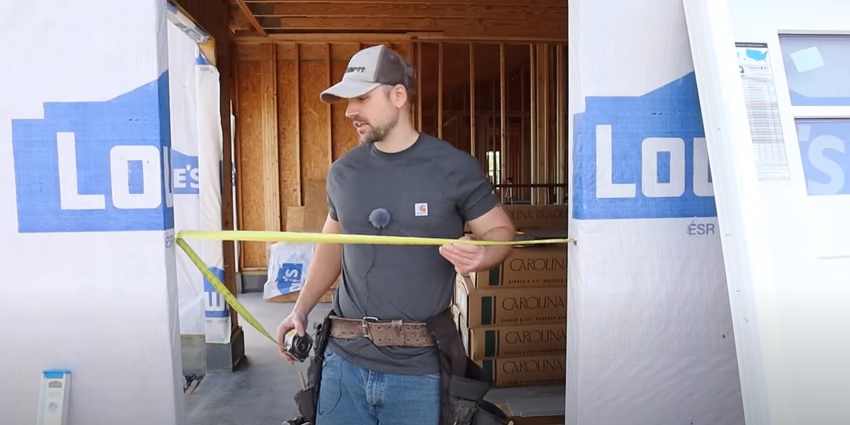
Typically, your rough opening should be 2” wider than your door. For example, the door I installed in the live demonstration is 36” wide, so I made sure my rough opening was at least 38” wide.
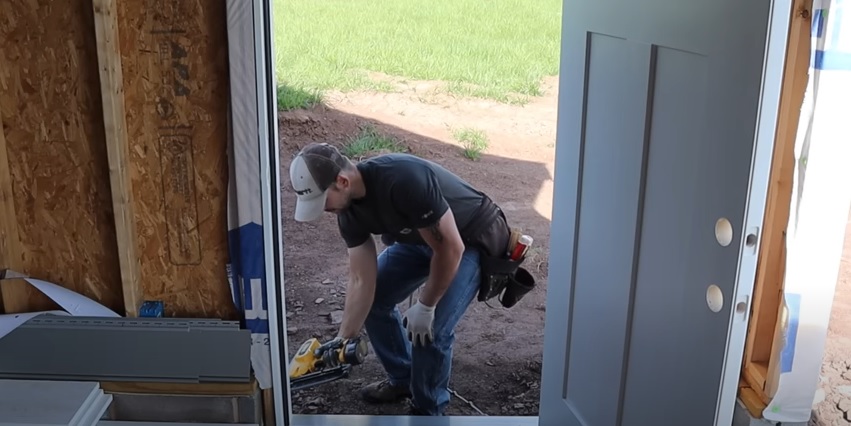
Step 3: Lay down a thick bead of Liquid Nails on the subfloor where you plan to set the exterior door.
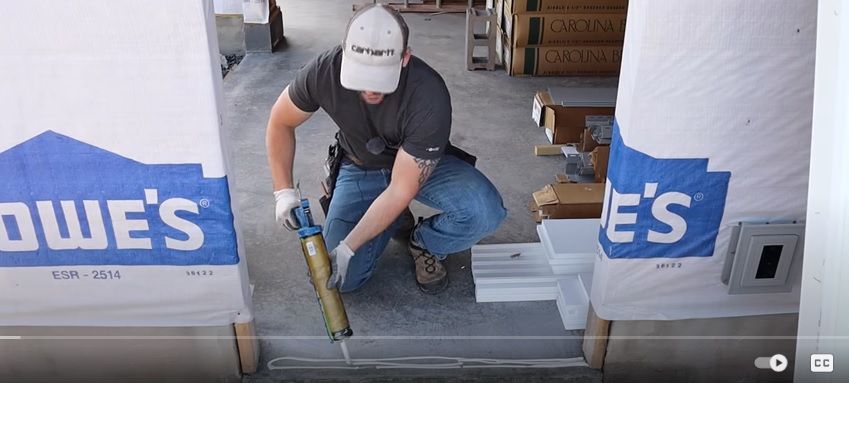
Pro Tip: If you’re installing the exterior door on top of a concrete subfloor, all you have to do is clean the area before laying down the Liquid Nails directly onto the concrete. But if the subfloor is wood or some other material, make sure you lay down some vinyl flashing first to protect it from moisture and weathering.
Step 4: Remove the plug from the opening for the doorknob in the exterior door. This will allow the door to swing open and keep the door balanced while you work on it, which is essential for solo DIYers!
Step 5: Set the exterior door in the rough opening, bottom first.
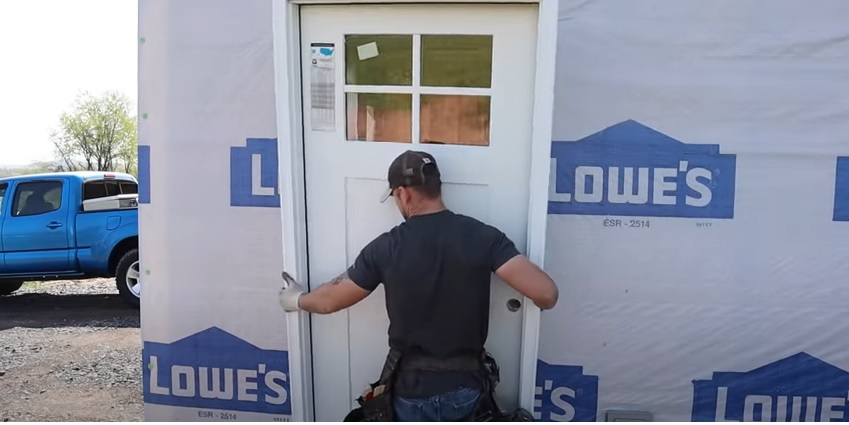
Once it’s set, kick it lightly to nudge it into its proper place, so that it’s centered. You’ll know it’s centered when there’s a ¼” gap on either side of the door.
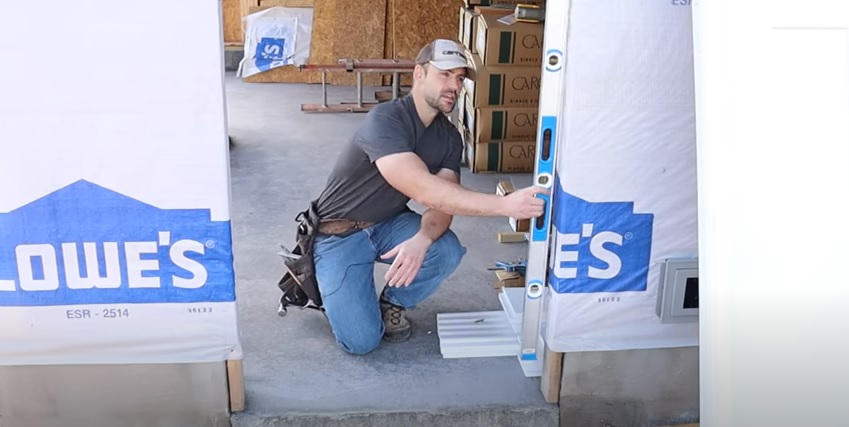
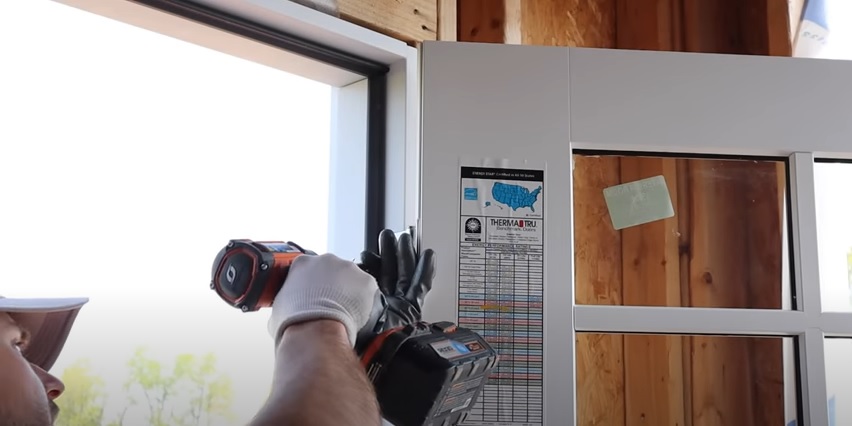
Step 6: After the door is centered in place, tack it down with two finish nails on the exterior using your nailer.

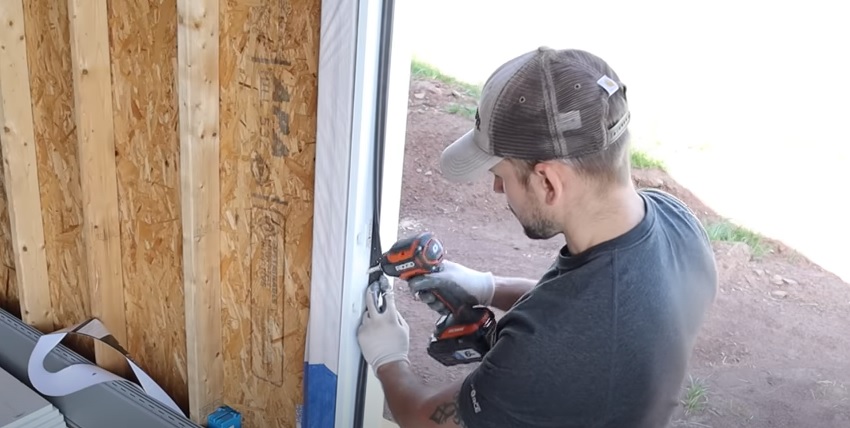
Step 7: Place your level against the hinge side door jamb. After making sure it’s level, tack a finish nail at the top of the door jamb.

Step 8: Check your reveal. There should be a thin space between the edge of the door on the handle side and the door jamb.
If your reveal has a large gap and is uneven, take the screws that came with the door and use your drill to install them in the appropriate door hinge. (For example, if there’s a gap in the reveal at the bottom of the door, install a screw into the top hinge.)
Snug the screw – don’t over tighten it – and then check your reveal. Once it’s even, install a single screw into each of the other two hinges.
Once again, don’t over tighten them, and always check the reveal after you’re done to make sure it didn’t move too much after you installed all three screws.
Step 9: Take the fourth screw from your door supply pack and drive it into the door side door jamb behind the weather stripping. (You can also use a decking screw if your pack didn’t come with a fourth screw.)
To do that, pull back the weather stripping and pre-drill a hole into the door jamb using an ⅛” bit.
Then, use your drill to drive the screw into the door jamb, so that the door is secured to the rough opening.
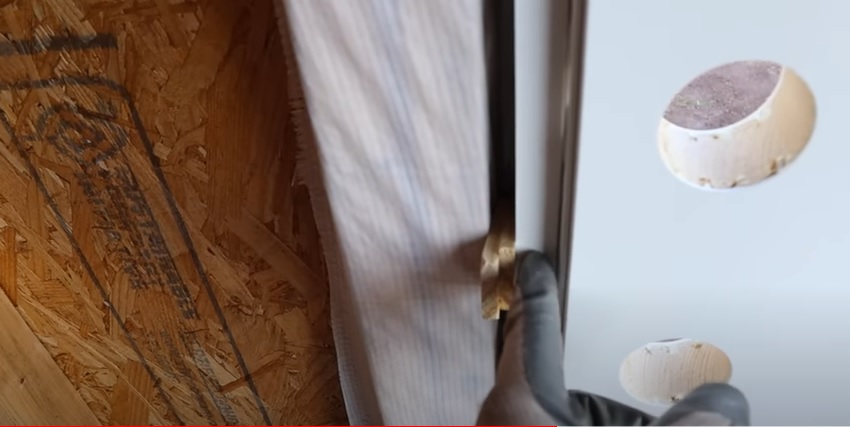
Step 10: Check the door’s reveal again. If it’s too snug, place shims at the top, middle, and bottom of the door to adjust the gap, and then secure them into place through the door jamb using your finish nailer.

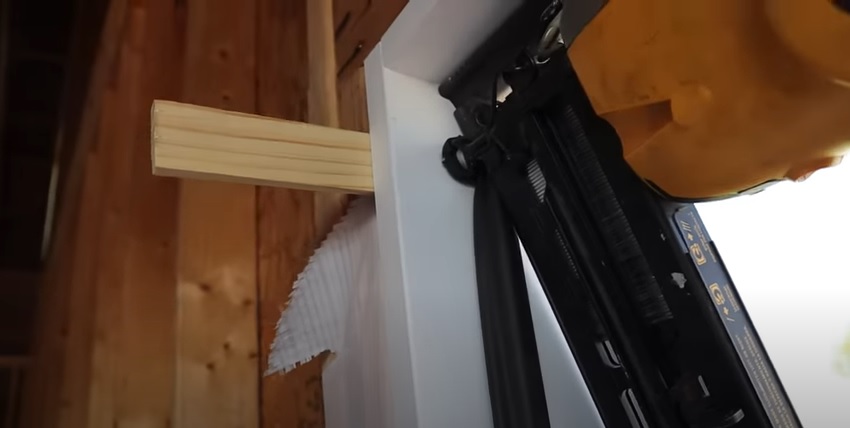
Step 11: Tack the trim of the door into place on the exterior of the house using your finish nailer.

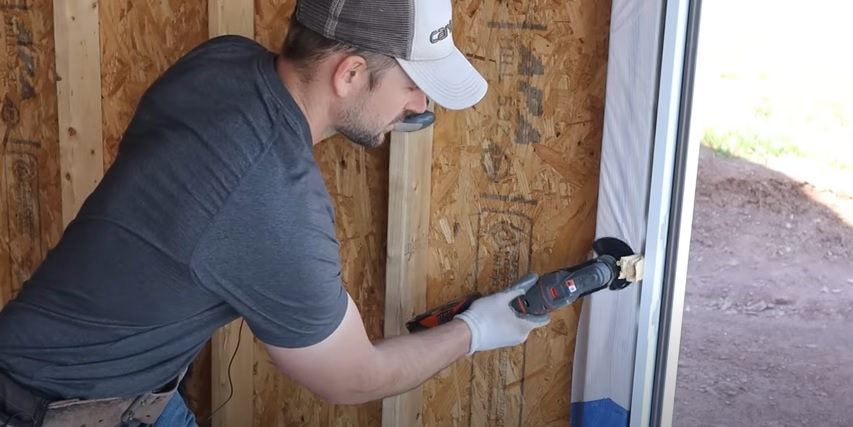
Step 12: Break or cut off your shim edges (an oscillator tool is great for multiple shims stacked on top of each other).
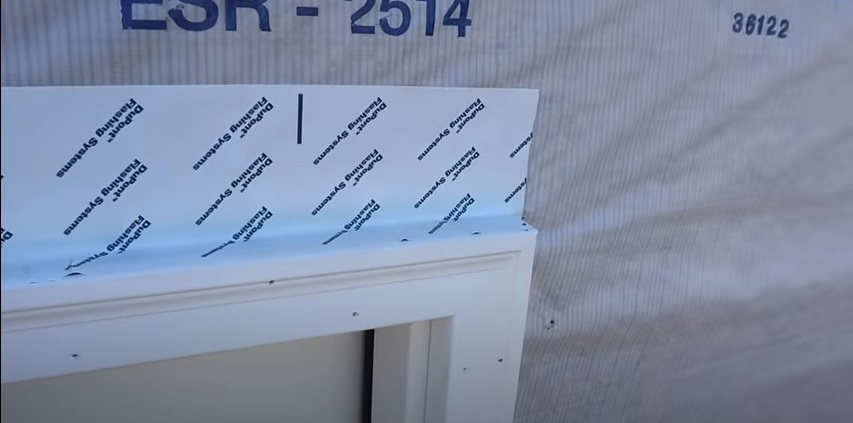
Step 13: Lay a strip of flashing tape over the top of the door on the exterior side. Then lay Tyvek tape on either side of the door. These measures will prevent moisture and weathering from seeping into the wall and the house by way of the door.
Step 14: Close the door and check if you can see daylight between the door and the door jamb on the hinge side. If so, use the foam pads that came in your door supply pack to fill the gap and make it airtight.
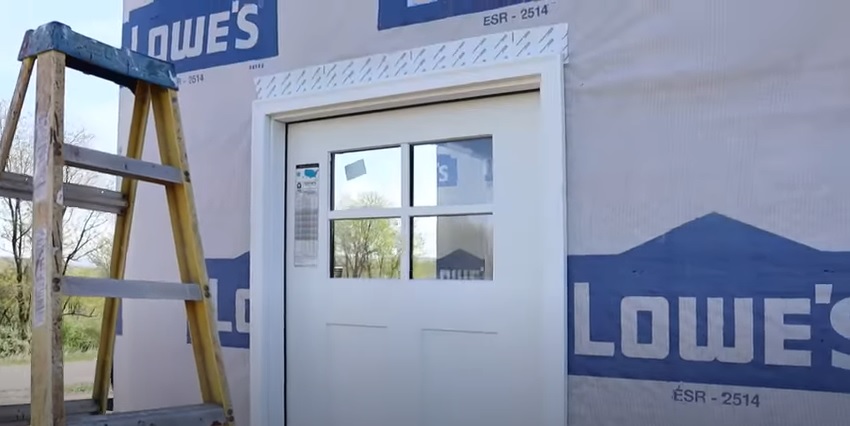
That’s all you need to do to get your exterior door installed before you add insulation! How long did it take you?
If you’re interested in learning how to do other DIY home building projects quickly and easily, keep coming back to my blog and check out the Excellent Laborer YouTube channel!