In this article, I’m going to explain how to prepare the corner of your valley roof for a soffit by building a double bird box into the underside of the roof overhang.
Keep reading to learn what a double bird box is (and why you need one!), the tools and supplies you’ll need for it, and a step-by-step guide to constructing one for your DIY house!
As always, CHECK YOUR LOCAL BUILDING CODES before taking on any DIY house building project, be it big or small.
What Is A Double Bird Box For A Soffit?
A double bird box is what I call a bird box for the underside of a corner of a roof where the roof has two slopes coming down into a valley shape. A bird box for this type of corner is made out of multiple small pieces of wood – called pork chops – to create a box shape.

This “box” is important for later on in your build, as it gives you something to attach your soffit to when you wrap it around all the corners of your roof.
You may be wondering why it’s called a bird box. It’s no secret that birds like to build nests in cozy, covered corners that are up and away from their natural predators. If you don’t completely close up the bottom of the bird box with soffit, you may find that before too long, a family of birds has made their home up there!
Tools And Supplies Needed To Build A Double Bird Box
DISCLAIMER – This article does contain affiliate links. I earn a small commission that helps support this website at no extra cost to you, if one of the links is used to make a purchase.
Here are some of the tools and supplies I like to use when I’m building a double bird box (if you want to know the specific brand and model of each tool below, I have them listed in the Excellent Laborer Amazon store).
- Sawzall
- Nailer
- Impact drill
- Hammer and nails
- Tape measure
- Framing square
- Speed square
- Leveler
- Scrap piece of 2×4 (about 2’ in length)
- Pencil
Step By Step Guide For Building A Double Bird Box For A Soffit On A House
Step 1: If one of the roof overhangs doesn’t line up with the other one, use a sawzall to trim it down and make the corner square.

To do this, you first need to know the elevation in terms of inches from the top plate. For my DIY house, the elevation is 4 ½”. Mark whatever your measurement is on the side of your house near the corner where you’re building a double bird box.


Next, take your framing square, line it up with the mark you just made, and then line the other end of the square up with the board you need to trim. Make a mark on the board at that point. Then use your speed square to mark out the specific angle you need to cut.


Finally, use your sawzall to trim off the excess wood and square off the corner.
Step 2: Use a leveler and a pencil to mark a straight line along the wall to the corner of the house where you initially marked your elevation measurement.


Step 3: Line up a small 2×4 (around 2-3’ in length) with the straight pencil mark you just made. Make sure one end of the 2×4 sticks out under the corner overhang, almost to (but not past) the inner edge.
Step 4: Nail the board into the wall with a hammer and nails. This will function as a temporary brace while you measure for and nail in the “pork chops” for the bird box.

Step 5: Measure the height and length of the corner in front of the end of the temporary 2×4 you just nailed into place.


Step 6: Cut a pork chop out of a 2×10 according to the measurements you made in step 5.
Make sure the pitch of the pork chop matches your roof pitch. In this tutorial, my roof pitch is 7/12.
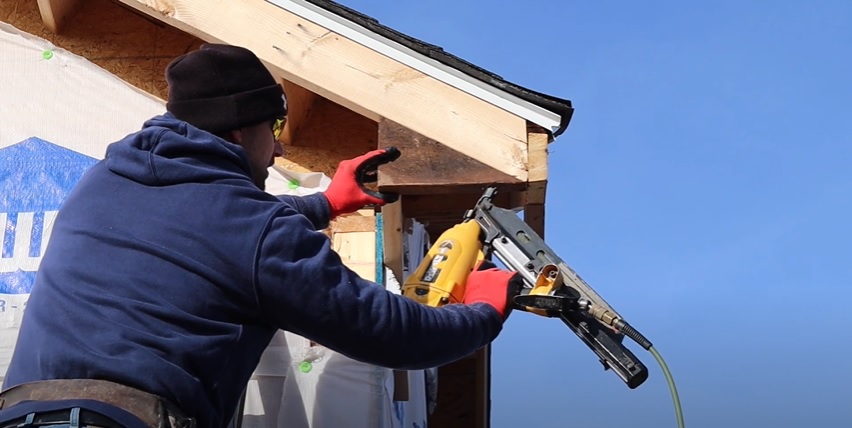
Step 7: Secure the pork chop into place using your nailer. Use just one nail for now.

Step 8: Remove the temporary brace. Then, nail it into place on the other wall using the same technique you used in step 4.

Step 9: Repeat steps 5 through 7 for the pork chop on this side of the valley roof corner.

Step 10: Remove the temporary brace again and set it aside.
Step 11: Measure from each pork chop to the side of the house to get the two measurements you need for the interior L-shape of the double bird box.

Step 12: Cut two pieces out of a 2×10 according to the measurements you took in step 11. Then nail those two pieces together into an L-shape, so that it looks like half of a box.


Step 13: Use your impact drill to drill four equally spaced holes from the outside corner of the L-shape you made in step 12 to the inside.

Step 14: Pre-start a screw in each of the holes you just made from the inside out. This step will make it easier for you to attach the L-shape to the corner of the wall under the roof.
Step 15: Slide the L-shape into place under the corner of the roof. Make sure it lines up on all sides with the pork chops.

Step 16: Screw the L-shape into place using your impact drill.

Step 17: Nail the pork chops to the L-shape using your nailer to secure everything together.

Whew! That was a lot of work! But now you have a beautiful, level bird box installed on the corner of your valley roof, ready for soffit.

Don’t forget that you can always find a demonstration of this build and other DIY house projects on the Excellent Laborer YouTube channel.
Pingback: How To Install Soffit and Fascia on a House - Excellent Laborer