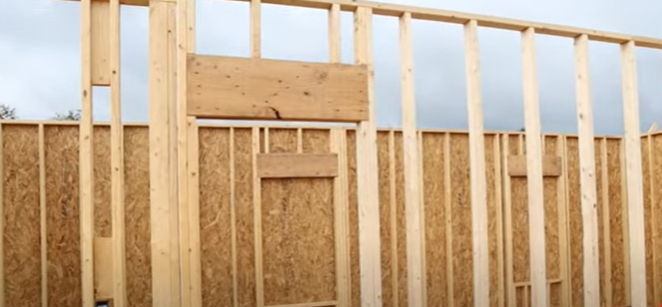
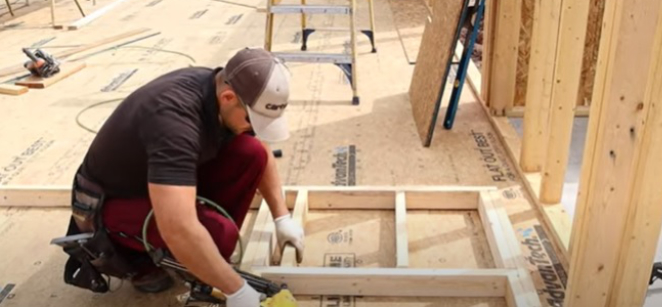
If you’re taking the DIY route of building a house or a similar structure, you must learn how to build an interior wall with a door. But before you can do that, you must determine whether the wall will be load bearing or non-load bearing.
If you’re not sure about the difference, don’t worry. I explain everything below and take you step-by-step through the process of building an interior wall with a doorway – both a load bearing version and a non-load bearing version.
Load Bearing Vs Non-Load Bearing Doorway
First, for those who may not know, what’s the difference between a load bearing doorway vs a non-load bearing doorway?
If a wall or doorway is load bearing, that means that it supports the weight of the roof and distributes it down through the floor to the foundation. These types of walls are integral to the overall structure of the building, so they must be reinforced with a header that is both tall and wide.
It’s important to construct, position, and secure an interior wall with a doorway that’s load bearing with care. Once the building is completely constructed, you won’t be able to go in and start ripping those walls apart to create new openings. If you do, the building could start to collapse in on itself.
A non-load bearing wall doesn’t require such a large header, as it doesn’t bear supporting weight from the roof through to the floor. That’s the main difference between these two types of walls.
Now that you know that, follow my step-by-step guide for how to build an interior wall with a doorway, both load bearing and non-load bearing.
How To Build An Interior Wall With A Doorway – Load Bearing
Step 1: Look at your building plans and check the size of your doorway. The size that you build, called the rough opening, should be an inch wider on either side and an inch and a half taller than your plans.
In other words, if your doorway is supposed to be 30 inches wide and 80 inches tall, build the rough opening out to be 32 inches wide and 81 ½ inches tall. This allows you some wiggle room for installing parts like the subfloor and the trim.
Step 2: Mark the length of the wall you want to build with a chalk line.
Step 3: Line your plates up with your chalk line. I usually like to get the longest plates I can, which is about 16 ¼ feet. Make sure you cut off the extra ¼ inch of wood (or however much is extra on your two by fours) to get an exact length of feet. That way your layout comes out even.

Step 4: Take a pencil and mark out on your plates where your jacks, king studs, and rough opening will be. This way you know where to attach your studs and cripples.
Step 5: Spread the plates apart and lay your studs out to bridge the space between them.

Step 6: When you get to your doorway, make a header that’s a couple of inches wider than your rough opening. This header is going to be large. I like to construct mine with two 2 by 12-inch pieces of plywood and sandwich them together with a piece of ½ inch sheathing. When it’s built, it’s going to sit on top of your 1 ½ inch trimmers. So, if your rough opening is 26 inches wide, make your header 29 inches wide.

Step 7: Line the header up with your king studs and your trimmers. Put about 10 nails in on either side to secure it in place.

Step 8: Measure the space between the header and the top plate and cut out your cripples. These will provide stability between the header and the top plate. Secure them in place with a nail gun.

Step 9: If the wall you just built will intersect with any other walls, be sure to add a partition corner.
To do this, take three blocks of wood, lay them down, and space them out evenly between two studs (the lengths of the blocks don’t matter, as long as they’re over 8 inches). Then secure the blocks to the studs with two or three nails on each side. Refer to your layout to see where the wall will intersect, and then nail the partition corner in between top and bottom plates.

Step 10: Nail in your studs, and you will have a rough interior wall frame which you can now lift up, anchor, and brace into place. I always line up my studs with the joists, as it makes a stronger, sturdier load-bearing wall.

How To Build An Interior Wall With A Doorway – Non-Load Bearing
The good news about building a non-load bearing interior wall is that it’s much simpler, at least where the header is concerned. For this build, follow steps 1-5 in the previous section and then come back here for step 6.
Step 6: When you get to your doorway, all you need for your header is a 2 by 4. Cut it to the size you need and then slide it, turned down, onto your trimmers. Then secure it all in place to your king studs.


Step 7: Measure from the top of the header to the bottom of the top plate to get the lengths for your cripples.
Step 8: Space out your cripples evenly and secure them in place with a nail gun.

Step 9: Now build and secure your partition corners (if you have any).
Step 10: Nail in your studs. Your non-load bearing interior wall with a doorway is now ready to go!


Don’t let the size and scope of putting together an interior wall with a doorway daunt you. You’ll find it’s a simple matter of determining if it’s load bearing or non-load bearing, and then following the steps as I laid them out in this article.
You can also watch my YouTube video if you need to view a demonstration.
Good luck and have an excellent build!

Thank you, you’re a big help sir
No problem!
Pingback: How To Build Jack Studs For Door Framing - Excellent Laborer
Pingback: How To Build A Wall With A Door Opening With 16″ On Center (O.C) Layout - Excellent Laborer
Pingback: How To Frame A Porch Beam - Excellent Laborer
Pingback: How To Build A Header - Excellent Laborer