Before you can pour the concrete for your garage, you need to form the base. In this article, I explain how to do that on your own or with only one person helping you.
Good news: it’s not hard. Bad news: it’s a lot of labor! But that’s all part of DIY house building, so instead of complaining, let’s get into the step-by-step tutorial.
Once again, ALWAYS CHECK YOUR LOCAL BUILDING CODES before you start a DIY house project like the one I’m about to teach you.
Tools And Supplies Needed To Form A Concrete Slab
DISCLAIMER – This article does contain affiliate links. I earn a small commission that helps support this website at no extra cost to you, if one of the links is used to make a purchase.
Below are the tools and supplies you’ll need to form a concrete slab for your garage. If you want to know exactly which ones I use, just go to the Excellent Laborer Amazon store.
- Impact driver
- Hammer drill
- Tapcons
- 2 by 6 wooden board
- String line
- Leveler
- Pencil
- Rake, shovel, pick, and wheelbarrow
Step By Step Guide To Forming A Concrete Slab For A Garage
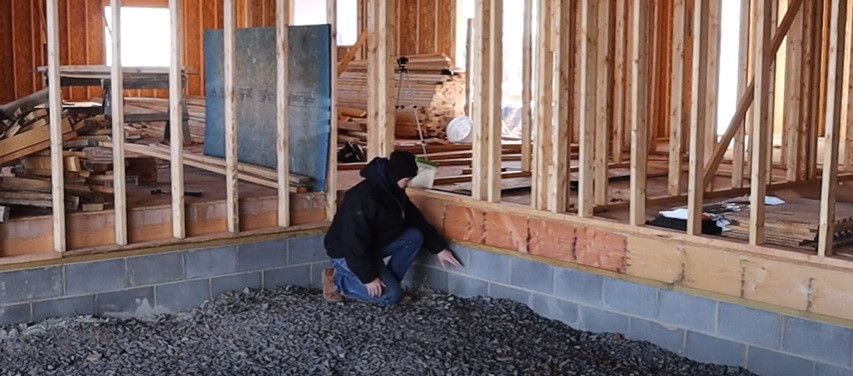
Step 1: Mark the grade you want for the surface of the concrete slab on the foundation.
In the image below, you’ll see that my garage has a foundation of masonry blocks. I wanted the slab to be around 5”-6” thick. Luckily, I was able to use the mortar joint between the blocks to “mark” the grade (which is also the top of the slab). I didn’t have to mark it in any way, since the joint was present and level all around the perimeter of the garage.
If the grade for your concrete slab doesn’t line up with the mortar joint in your foundation, measure from the top of the masonry block down to the point where you want the surface of the concrete to break. Make a mark, and then make similar marks in all four corners of your garage. From there, chalk a straight, level line between each mark.
Those lines will let whoever pours your concrete know that the surface of the slab needs to break at that point.
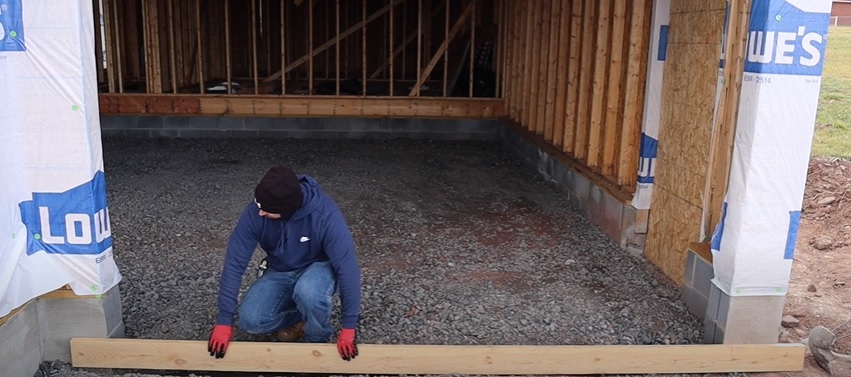
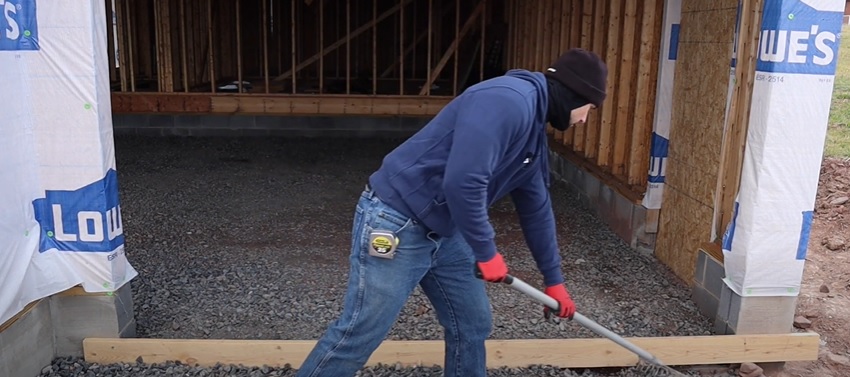
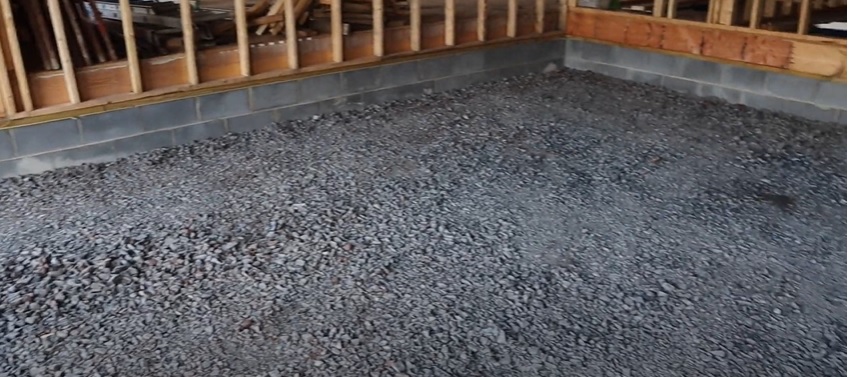
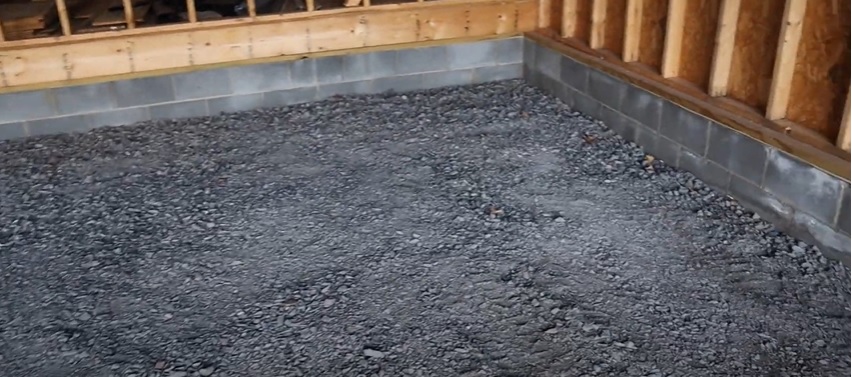
Step 2: Level the gravel base. Completing this step allows the concrete pourer to pour a level layer of concrete up to the grade you marked in step 1.

When I level off gravel for a concrete slab, I like to start from the back of the room (which in this case is the garage) and work my way forward.
For tools, I rotate between using a rake and a pick to break up gravel and then move it where it needs to go. I also sometimes use a shovel to scoop up excess gravel and dump it in a wheelbarrow. That way, I can easily transport the gravel to disperse it in another part of the garage or, if I don’t need it, away from the worksite.
Pro Tip: To make sure you’re distributing the gravel evenly, take a wooden board that is the same number of inches in width as your concrete slab will be in height (in my case, I used a 2 by 6). Lay one end flush against your foundation, so that the top is level with the grade you marked out in step 1. Then, place your leveler on top and check if the gravel underneath the board is level.

This trick not only helps you check your work, but it also helps you identify areas of the gravel that are too high or too low.
Step 3: Mark a ½” incline on the outside edge of your doorways to indicate where the concrete slab should slope downward.

The concrete should slope slightly down wherever you have doorways. This incline will prevent rain or flood water from seeping into your garage.
For the purpose of this tutorial, we want the incline to be a half inch. To mark it out, find the grade on the masonry blocks or plywood surrounding the doorway. Then, measure ½” down from the grade and mark it on the outside edge of the block or plywood.
Repeat this step on both sides of the doorway.
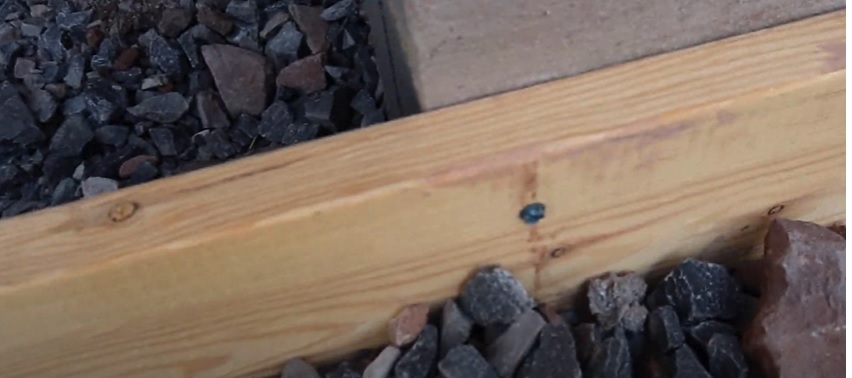
Step 4: Install form boards across all the doorways that lead outside from the garage.
The form boards will serve two functions. The first function is as a border for the poured concrete. The second one is as a sign for the concrete pourer that there will be a slope in that area.
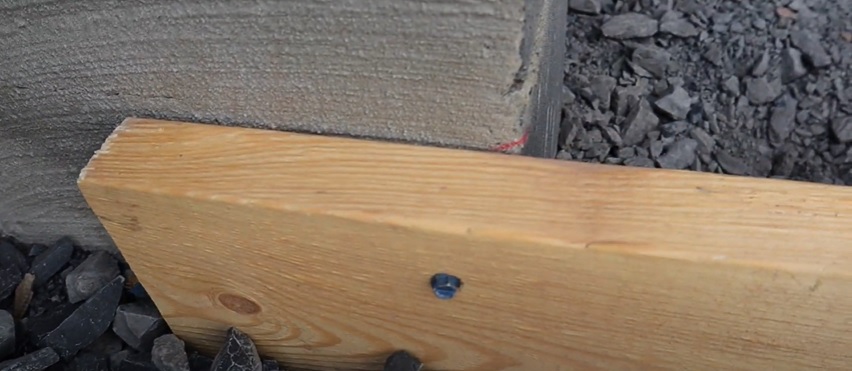
Since my concrete slab is going to be around 6” in height, I decided to use a 2 by 6 wooden plank as a form board for the garage door. To install it, I set up the plank and ensured that the top of it was flush with the ½” mark I made on the masonry block in step 3. Then, using my impact driver, I bored a hole through the 2 by 6 into the block. Finally, with my hammer drill, I screwed in a tapcon to hold the board in place.
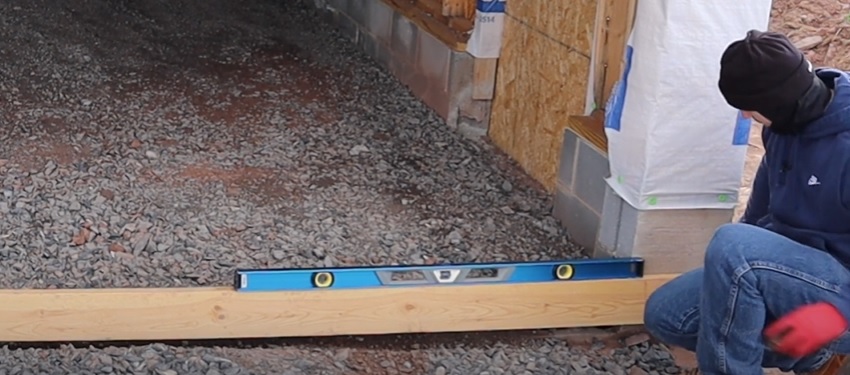
To make sure I secured the other end of the form board in the right place on the opposite side of the doorway, I used a leveler. This method ensures that the board is as straight as possible for the concrete pouring. Once I determined the board was level, I screwed the other end in the same way I did the first end.
Step 5: Move gravel in front of the bottom of the form board to prevent the concrete from seeping out when it’s poured.
Believe it or not, that’s all there is to it! Only five steps, and your garage is now formed for a concrete slab. Do not forget to add rebar and plastic down before pouring the concrete.

For more excellent DIY house tutorials like the one above, be sure to check out the Excellent Laborer YouTube channel.